


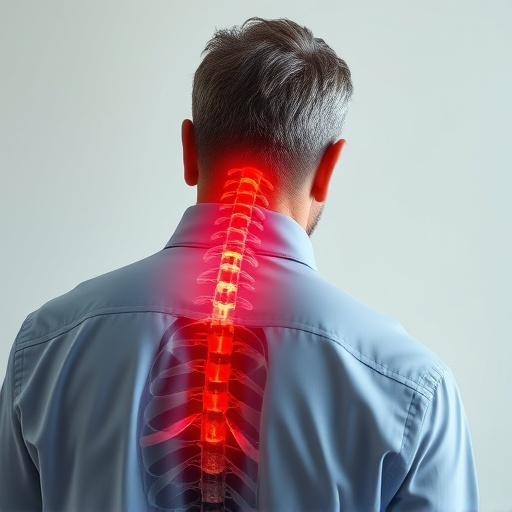
The Direct-to-Film (DTF) transfer process offers precise, high-quality printing on diverse materials by eliminating intermediate steps, including carrier films. After a successful DTF transfer, removing the carrier film is crucial to prevent damage. Physical techniques like credit card edges or heat guns can gently peel away the film, while chemical disintegration methods such as acetone or isopropyl alcohol dissolve it. Troubleshooting tips include using heat with caution and testing on scrap material first. A brief rest period, proper tools, solvents, protective gear, and ventilation are essential for successful carrier film removal.
Uncovering the secrets to mastering carrier film removal after a DTF (Direct-To-Film) transfer is essential for achieving crisp, permanent prints. This comprehensive guide delves into the intricacies of the process, offering valuable insights for both novice and experienced graphic artists. From understanding the role of carrier film in DTF transfers to employing effective physical and chemical methods, you’ll discover proven techniques to ensure a successful removal process, leaving your final products pristine and professional.
- Understanding DTF Transfer and Carrier Film
- Preparation Steps Before Removal
- Physical Techniques for Film Elimination
- Chemical Approaches to Carrier Film Disintegration
- Common Challenges and Troubleshooting Tips
- Best Practices for a Successful Remove
Understanding DTF Transfer and Carrier Film

The Direct-to-Film (DTF) transfer process is a cutting-edge technique that allows for precise and high-quality printing directly onto various materials, including textiles, plastics, and metals. This innovative method streamlines production by eliminating intermediate steps, such as using carrier films. In traditional transferring, carrier films act as intermediaries, temporarily holding the design before it’s transferred to the final surface. However, these films can be pesky, requiring careful removal after the application to avoid damaging the printed material or leaving unwanted residue.
Understanding DTF transfer involves comprehending that it directly deposits ink onto the target surface, bypassing the need for carrier films. This not only simplifies the process but also ensures better adhesion and longevity of the print. By eliminating the intermediate step, DTF offers enhanced accuracy, faster turnaround times, and cost-effectiveness. Thus, when discussing techniques for removing carrier film after a DTF transfer application, it’s crucial to keep the unique characteristics of this direct printing method in mind.
Preparation Steps Before Removal
Before attempting to remove the carrier film from a DTF (Direct-to-Film) transfer, there are several crucial preparation steps to consider. First, ensure that the transferred image is completely dry and cured. This step is vital as any residual moisture can cause issues during removal, potentially leading to bubbles or distortions in the final design. Check the manufacturer’s instructions for recommended drying times, which may vary depending on the type of ink and substrate used.
Additionally, gently cleaning the surface where the transfer was applied can help ease the removal process. Use a soft, lint-free cloth or sponge to wipe away any visible dust or debris without damaging the transferred film. It’s important to be gentle during this step, as aggressive scrubbing could potentially disrupt the adhesion of the carrier film, making its removal more challenging.
Physical Techniques for Film Elimination

After successfully completing a DTF (Direct-to-Film) transfer, the next step is to carefully remove the carrier film. Physical techniques offer effective methods for achieving this delicate process. One common approach involves using specialized tools like credit card edges or spatulas to gently lift and peel away the film. This method requires precision to avoid damaging the transferred image.
Another physical technique involves heating the film with a heat gun or hairdryer, which causes it to shrink and loosen from the surface. Once softened, the film can be easily peeled off, ensuring a clean transfer without leaving any residual residue. These physical methods are reliable and straightforward for eliminating carrier films following DTF applications.
Chemical Approaches to Carrier Film Disintegration

Chemical approaches to carrier film disintegration play a crucial role in post-application processes for DTF Transfers, offering efficient and precise methods to remove the protective film. These techniques leverage specific chemicals that facilitate the breakdown and dissolution of the carrier material, leaving behind only the desired transferred image or pattern. Common substances used include organic solvents like acetone or isopropyl alcohol, which are effective in softening and dissolving the film.
Each chemical has its unique properties and applications. For instance, acetone is versatile and widely available, making it a popular choice for DIY projects. Isopropyl alcohol, with its higher boiling point, can be more suitable for delicate materials or when precision is required. Understanding the compatibility of these chemicals with various substrates is essential to prevent damage to the transferred layer while ensuring complete removal of the carrier film.
Common Challenges and Troubleshooting Tips

Removing carrier film after a DTF (Direct-to-Film) transfer can be challenging, often presenting several common issues that users face. One of the primary difficulties is achieving complete removal without damaging the transferred image or the receiving surface. The adhesive properties of modern carrier films are designed to protect during application but can make extraction a tricky process.
Troubleshooting tips include using heat with caution—while it softens the film, excessive heat might distort the transferred graphic. Additionally, applying a solvent-based remover or a specialized tape designed for carrier film removal can aid in peeling without leaving residue. It’s crucial to test these methods on a scrap piece of material first to ensure they won’t cause harm to the finished transfer. Patience and careful manipulation are key to overcoming these challenges.
Best Practices for a Successful Remove

For a successful removal of the carrier film after a DTF (Direct-To-Film) transfer application, several best practices should be followed. First, allow the transferred film to sit for a brief period after application to ensure it has adequately adhered to the substrate. This rest time allows the adhesive properties to set, making the subsequent removal process smoother.
Next, prepare your tools and workspace before beginning. Use a suitable solvent or adhesive remover recommended for the specific carrier film and transfer material. Wear protective gear such as gloves and goggles to prevent skin contact or inhalation of fumes. Additionally, ensure good ventilation in the work area to minimize exposure risks.